 |
| Image: Design*Sponge |
What you need.
1. Pots. Unglazed or rough surfaced ones are preferable, but glossy finish ones will also work.
2. Strong adhesive. Try No More Nails which you can easily pick up in any DIY store.
3. Collection of corks, scrap wood, bottle caps or other small round objects.
4. Black paint & white paint.
5. Paintbrush.
6. Scrap paper or tarp.
7. Clear sealant spray paint (matte). Try Rustoleum Crystal Clear from any DIY store.
8. Small saw
9. Sandpaper.
10. Masking tape.
Instructions:
1. Use the saw to cut corks and wood into the shape you want.
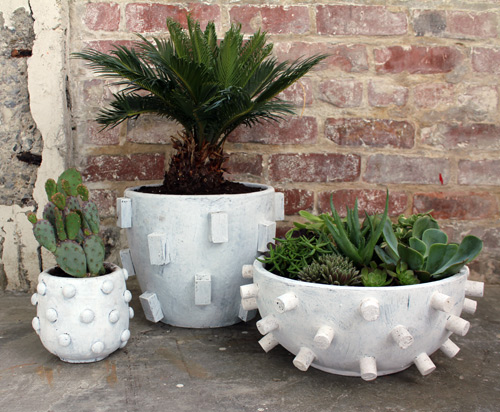
You will need about 40 cork halves or 20 wood blocks to create a design like the ones in the photo.
Sand the wood to remove any splinters.
2. Following the instructions on the adhesive and apply to the bottom of the cork/wood/caps and then stick them to the pot about 1″ to 1.5″ from the top rim. You could measure and map it out the placement of the rest of the pieces for an exact composition or you could just judge it with your eyes. Use a small piece of masking tape to hold pieces in place while you wait for the adhesive to harden.
 |
| Image: Design*Sponge |
 |
| Image: Design*Sponge |
3. Once the adhesive has set (per the instructions) place pots on a painting surface and roughly cover with black paint.
**You will be covering this with white paint later and rubbing off some of that white paint off to create a weathered look, so the black paint doesn't have to be perfect but it does need to be completely dry before applying the white.
 |
| Image: Design*Sponge |
4. When the black paint is completely dry, go over the whole piece with white paint.
Again, you don't have to cover every inch of the pot, as you will use some paper to rub off the paint in areas like the rim and the edge of some of the raised pieces. This will add to the weathered, organic look.
Once you have covered the pot in white (and removed some of it), set it aside to dry again.
5.Once the paint is dry, take the pots to a well-ventilated spot and cover with a coat of clear matte spray. This will protect your paint job from rubbing or wearing off when the pot gets wet.
All that's left to do is transfer your plants.
 |
| Image: Design*Sponge |
 |
| Image: Design*Sponge |
You can, of course, paint them any colour you like. The choices are endless.
Black is a good undercoat if you're going for that weathered, worn look but you could use brown or terracotta too.
.
No comments:
Post a Comment